Greetings friend. Thank you for being here. Dismiss

  • Skip to primary navigation
  • Skip to main content
  • Skip to primary sidebar

A Designer At Home

Designing Beautiful Spaces. Inspiring Authentic Living. Spreading Good Vibes.

  • About
  • Policies
  • Sponsorship
  • Shop
  • Contact
  • Blog
  • About
  • Policies
  • Sponsorship
  • Shop
  • Contact
  • Blog

Shower & Tub Surround Tile and Grout

December 1, 2015 by CORINNA HENDERSON

A Boho Globally Inspired bathroom renovation using patterned moroccan inspired tiles

Hey guys,

As I promised, I’m checking in with an update on our bathroom remodel. Things slowed down quite a bit with the Thanksgiving holiday but there’s still a bit of progress to share with you.

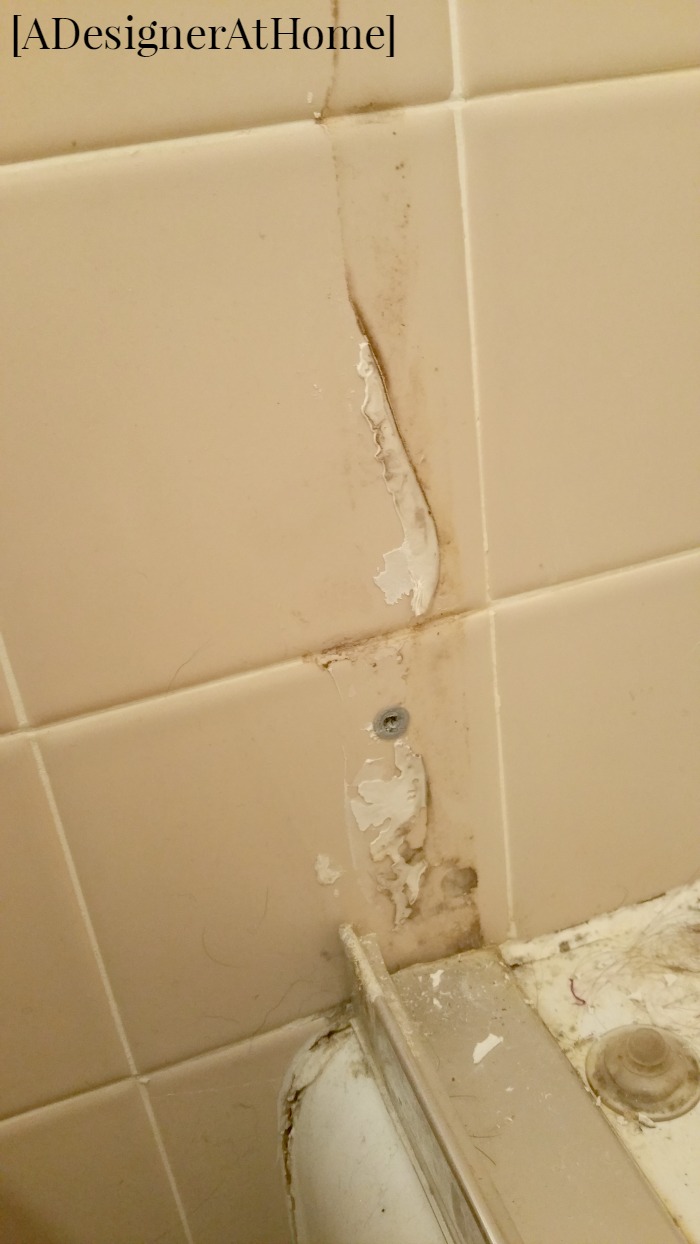
I had a few questions from you all about grout. Originally the plan was to use turquoise blue grout. And then my contractor used it as adhesive for the shower tiles. And then told me he couldn’t use it to grout the tiles because he needed unsanded grout for the measurement of gap between the tiles. How discouraging!

I was pretty bummed out that he used the grout as adhesive without speaking to us about it first. The cost difference between generic ol’ adhesive and the turquoise grout is hefty. And I have used it in a tiling project where the grout size was quite small (remember my tiled ottoman tops?). So the whole ordeal has been really frustrating.

moroccan-inspired-mosaic-tile-patterned-tile-shower-ledge-shelf-insert

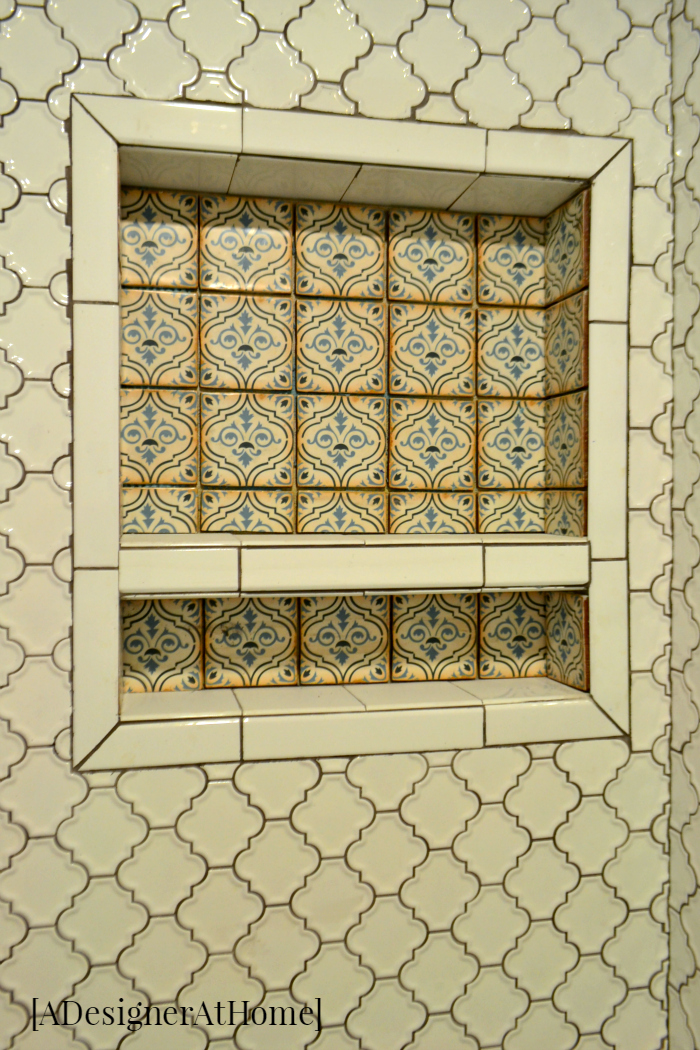
With the use of the turquoise grout out the window because it’s a sanded grout, we went shopping at The Home Depot to check out their selection of grouts. We chose an inexpensive unsanded grout by Polyblend in the color “New Taupe.” It’s a very pretty color. Striking against the white. A very classy combination. Not exactly the vibe I was going for, but I think that it’s offset by the patterned tile insert quite nicely.

Speaking of the insert, I’ve had to put my foot down and demand that he use the turquoise grout here. I know it can be used in a smaller tile gap and I really wanted it used in the space. With only 1 tub left (out of the 8 I had), this is going to have to be the unexpected pop of fun I crave.

moroccan-inspired-tile-old-world-bronze-bathroom-fixtures

I don’t want to come off completely underwhelmed, ungrateful, or pissed off. I appreciate all the hard work my neighbor has done. And I’m not pissed off. Things didn’t go quite according to plan. While I would have preferred he discuss the use of the product in this way with us, he wouldn’t have used it to grout the whole shower surround anyways. And it really is beautiful how it’s turning out. I’m betting this color will be a whole lot easier to keep clean looking anyways so this could just be a blessing in disguise.

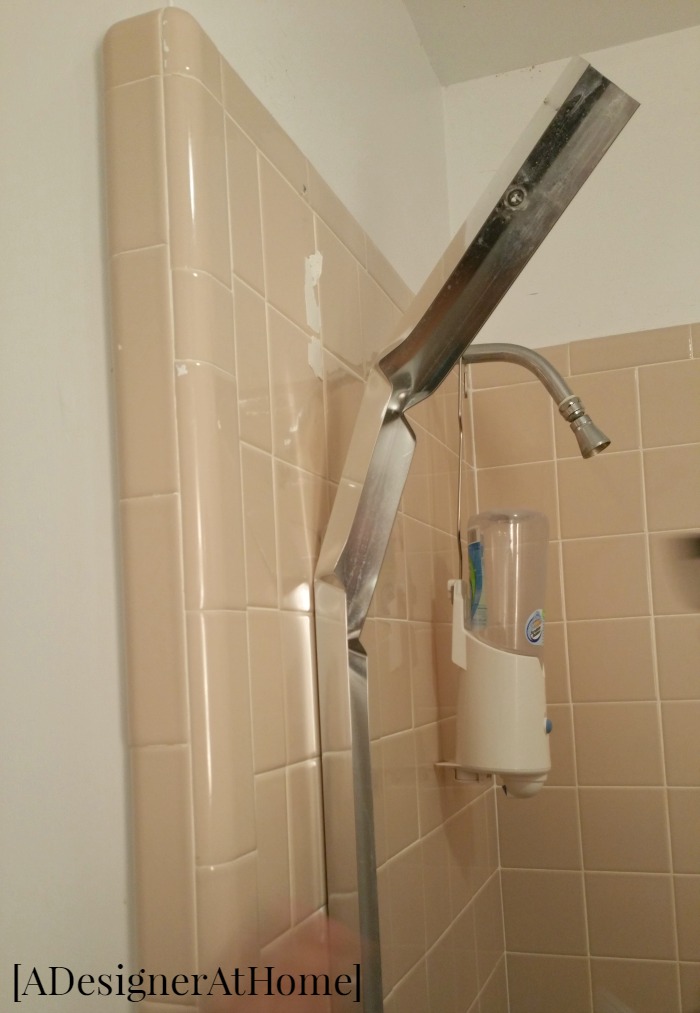
So that’s what we’re looking at for progress on the shower surround.

wood-look-floor-tile

The floors are really exciting. They’re actually going perfectly according to plan. We’re using the same Polyblend grout in “Tobacco.”  The floor tile is from Lowe’s and it’s GBI Tile & Stone Inc. Madeira Oak Ceramic Floor Tile. It’s a touch warmer than the picture online shows. We bought ours online and picked up in store.

*Lowe’s & The Home Depot are Ebates stores so you get cash back when you buy online and pick up in store 😉

So there’s a lot of really good things moving forward right now. With the holidays upon us, I’m not so much focused on getting projects done for the bathroom. Our contractor is doing what he needs to do on his end, but I won’t be picking back up on any projects until after the new year. I’ll still keep updating, but keep a look out for a few holiday themed posts. It’s the most magical time of year 🙂

Filed Under: Main Bathroom, Renovations

My favorite “fall back” gift

November 30, 2015 by CORINNA HENDERSON

materialconnectionminted

The Perfect Go To Christmas Gift Idea

Pictured Clockwise from top left: 1, 2, 3, 4

We all have to have a “fall back” gift sometimes. It’s a busy time of year and it’s easy to get fried out. So when that hits and I lose creativity juices and can’t quite get my brain to focus on yet another task, I have a “go to” gift that I can use for Holidays and Birthdays. For me it’s a photo gift. For the past few years I’ve explored a few different ways of doing this, essentially plastering my child’s face on anything a photo can be plastered onto. But there’s definitely a refined way of doing a photo gift so I thought I ought to pop in and share it; We are, after all, getting quite close to Christmas so I thought it might be helpful for those of you still shopping.

Especially for family that lives farther away and that we don’t see often, I like to give them a photo gift so they can be reminded of how much we love and think about them. My mother in law lives in New York and we live in Virginia. She makes the drive to visit us many times during the year and we try our best to send videos and pictures, but just like the busy holiday season, life in general gets busy. So gifting a professionally printed and framed portrait for her to display with her decor is our way of being there without being there.

theperfectgotochristmasgiftidea

Here are some elements I’m loving right now for photo art gifts:

Foil Pressed. It’s totally in right now and I hope it stays in trend forever because the glow of rose gold flashing in the light is dreamy. It gives the art an ethereal vibe and I love working a bit of ethereal into my home so it’s even more like giving a piece of us to our family.

Custom Framing. Frames make or break a piece of art. They either integrate it into a room or make it stick out like a sore thumb. I am pretty smitten with the antique filigree and natural french farmhouse frames. But I do have a print in the whitewashed herringbone frame and that’s beautifully crafted too.

Black and white and/or nature backdrops. A family photo in the woods just has that, I don’t know exactly how to put it, a “one with nature” feel to it. I love the ominous look of forestry and how it pairs with smiling faces. Kick that feel up with black and white and I’m googly eyed but even changing up a standard family photo to black and white really lets any foil design pop.

french state art foil silhouette foil photo art

I’ve created two photo art gifts in partnership with minted this year. Putting my favorite photo art gift elements to use and taking into account where these pictures will end up hanging, here’s what I created.

holidaygift1 holidaygift2

For my mother in law, I still chose the rose gold for that sweet vibe, but I went with the distressed cottage white frame because I feel like it fits her style. She’s got a very hip style about here that always speaks to spring and summer. I’ve not had the chance to see her home yet so I based my frame choice on her style.

I also created one for our home. We serious lack at hanging photos of ourselves and our loved ones so this is the perfect catapult to starting a collection. I went with the antique filigree frame for the romantic boho feel and again the rose gold. It’ll suit our design aesthetic and I think it makes a great gift to “us” since we rarely get to focus on that.

Whether sourcing a gift for someone you’re stuck on, or you want to add a special touch to a gift you’ve already settled on, the personalized touch of a custom photo gift is heartfelt. It’s an easy “fall back” kind of gift if you already have a general idea of what you like and people love these things.

If you’re still working on cards for the holidays, I’ve also put together a guide on “Little Ways To Make Card Giving Extra Special.” I’ll be using the feather card stuffer idea from those ideas and I’m using it with the Fir Frame Foil-Pressed Holiday Cards. I’m sharing a look at the card’s design in that post so head on over, gather a few ideas, and check out our cards!

Filed Under: Blog, Holidays

Choosing A Contractor for Our Bathroom Remodel

November 25, 2015 by CORINNA HENDERSON

How To Find A Remodeling Contractor - Resources & Experiences. I've never thought about how to do this before!

Hey Guys,
I thought it may be helpful and fun to chat a little bit today about how and why we chose a contractor for our bathroom remodel. I wish I could say that I read a few blog posts and felt empowered enough to tackle this on my own. But, truth be told, I have no experience putting up drywall or tiling for real life use (one time I tiled a flip top ottoman top… but that doesn’t have to hold up to the wear a bathroom does).

I first resorted to asking friends and facebook. I received 1 lead. Better than nothing I suppose. I didn’t end up feeling like I jived with the contractor (like, I said I didn’t beadboard but that ended up on our quote anyways).

So I resorted to google and ended up discovering s resource called NARI (National Association of the Remodeling Industry). It helped me hone in on a few contractors in my area. I vistied the sites of each company to see what services they provide. I found 2 that were in my immediate area (important when you’re paying for travel!) and filled out their contact forms.

Unfortunately I only heard back from one of them. The quote was quite a bit higher than the first contractor I spoke with. But they agreed to materials I wished to have used in the space (the height different between our bathroom floor and hallways was atrocious, so I wanted to use schluter ditra mat because it’s the thinnest material available as an udnerlayment.) So I knew those things would come at a premium and would cost me more money.

men-working-978395_1280

I think the biggest stomach ache in this whole process is seeing the estimates. We’re proving lighting, tile for the floors and bathtub surround, keeping our toilet, bought our own tub and providing the vanity. Guys, the estimate for them to put the stuff in and finish everything off is $7-$8 thousand dollars! Pinterest has put pure shock in my soul to see this number.

Initially we settled on doing the work with this company because I hadn’t received a response from the other company and the first it felt like it would be difficult to work with. It was difficult for me though because I really wanted more quotes. Finding a contractor that listened to my ideas and responded to my connect form was harder than I had expected.

I wasn’t settled on the price though. I just wasn’t buying that my two options were thousands of dollars apart so one sleepless night I turned to Google and stumbled across Networx.com. I filled out a questionnaire and it said I’d be contacted the next day. I didn’t hear anything and my heart sank deeper. A few days later though, I received a voicemail. Contractor 3 came through and gave us an estimate much closer to the one I received initially. He wasn’t free to start for a few weeks but that was OK with me. We jived well, he made great points in the initial walk through and I was happy.

With all this going on, my husband traded in his car for a beater truck and got to talking to one of our neighbors. We didn’t chat with them much before but it turns out he’s a contractor. Literally right across the street a contractor had been living this whole time. It’s crazy how God works sometimes. He gave us a quote we were happy with (right on par with #1 and #3) and he was able to start right away.

We’ve had lots of setbacks that weren’t his fault, he’s been doing a good job and I’m happy we’ve been able to employ a neighbor, make a friend, and learn a whole lot about the contractor interview process.

Living in the “Pinterest” age has definitely left my expectations cheap and fast. But I’ll definitely keep documenting the process and sharing how this whole things goes just in case there’s a non bathroom DIYer who could use the experience to help themself.

It turned out all of the quotes were really not far off from what’s average for my area. Through a fit of tears I found a couple of resources that confirmed that like ImproveNet and the widget I’ve included at the end of this post.

Oh, and in the interest of full disclosure (and I’m sure someone will bring it up), we totally tried to facelift the space. We paid a friends husband to tear up our old tile. He literally only pulled up the tiles and left the beat up old cement board, assuring us it was good to tile over. I ended up tearing it up myself because it crumbled beneath our feet and I felt like that was not going to fly to put tile atop. I bought ditra, mortar (thanks Lowe’s guy who sold me the wrong one- gosh that led to a lot of tears at the end of that day!), tiling supplies (again, thanks lowe’s guy who sold me a notched trowel with notches WAY to big for my tiny mosaic tile) and tried to give the space a simple facelift. I lived with mortared over ditra for more than two months. I am not at a place in my life to try tiling again. (I may be the only person to tell you that tiling is hard, but from a complete novice’s experience- I found it hard!)

So a contractor was the only way this is going to get done for us. And it needed to get done. There are a ton of things I have beene doing myself- so don’t fear. I have a lot of cool decor and DIY coming your way so stay tuned (because Macrame and paint I can but Tile I cannot 😉 )

HomeAdvisor

Remodel a Bathroom Project Cost

View more Bathrooms cost guides or View all home projects

Filed Under: Renovations

Removing Sliding Doors from a Shower

November 24, 2015 by CORINNA HENDERSON

How to remove sliding shower doors & why you really should!

Hey Guys!

Today I’m popping in with one of those nitty gritty posts that have a better looking after but it’s far from pretty but what I learned may help someone else so I’m sharing for the love of everyone being capable of doing things to their home to make it a space they want to be in. That was probably a run on sentence. If you have a sliding doors enclosing your bathtub and want to remove them, I’m going to walk you through how we removed ours (Unfortunately I can’t say for any certainty that mine were installed like yours and different models may have differences in the deconstruction process).

We have 1 single freaking bathroom in our home. We aimed to buy a house that we could afford in the event one of us lost our job and that meant making sacrifices like 2nd bathrooms and square footage. We hope to one day have the funds to add onto the house and in that addition a second bathroom, but for now we are renovating the existing bathroom to be our “dream on a budget bathroom.”

One of the first things we did, even before the full blown renovation, was remove the shower doors. They were obviously harboring mold and they’re a pain to keep clean. I prefer the ease of use and interchangeability of shower curtains. These doors had to come down. So I mentioned to my dad that I was removing them and was running into a few issues figuring out how they came apart and my dad is awesome so he came over to help out.

The doors were easy. Ours hung from wheels on a track from the top. So we just lifted those right off and hauled them off to live in our garage for a few years.

Then the top piece lifted right off the sides.

How to remove sliding shower doors without damaging tile

And this was where I was a bit stuck. The sides were screwed into the tile. But when I took the screws out, the sides didn’t budge. And I didn’t fully expect them to since I could see an adhesive oozed out from the sides in a few spots. So with the direction of my dad, we took putty knives and worked it behind the sides. And it was a simple matter of prying and working the putty knife further down the frame.

How to remove sliding shower doors without damaging tile

The pieces were not salvageable because they were quite flimsy and bent with the slightest tug against the wall.

Once the sides were off, we started to see just how much mold these doors were harboring. I cannot recommend sliding shower doors after seeing what was growing after living in the house for just 2 years (the bathroom was “remodeled” just before we moved in). We have a great exhaust fan and use it every time we shower.

How to remove sliding shower doors without damaging tile

How to remove sliding shower doors without damaging tile

And then it became abundantly clear what kind of situation we were living with. Things. Were. Gross.

I will forever be a fan of shower curtains.

So all in all, I would have to say you shouldn’t ever install them. And if you have them, grab a screwdriver and a putty knife and get that thing out.

Warning- this makes my stomach queasy-

How to remove sliding shower doors without damaging tile

So I hope you’ve found this post helpful. And if this is the first post of mine you’ve seen, please stick around and check some other things out. I’m normally not showing you gross pictures of mold! I prefer pretty things 😉


Filed Under: Main Bathroom, Renovations

Get The Most Out Of a Cheap Christmas Tree

November 23, 2015 by CORINNA HENDERSON


how I made my $40 cheap christmas tree look thicker, bushier and beautiful - budget savvy christmas decorating

Last week I decided it was finally time to upgrade from our $40 Christmas tree and while it’s too early to be thinking about this for some, I know some of you are on the same page. This time around I had a bigger budget thanks to some financial stability that came into our life this past year, but it still didn’t leave us room to buy the bushiest, realest looking tree available. So I thought it might be a good idea to reshare my tips for making a cheap Christmas tree look more expensive.

The price of a good fake Christmas tree is astonighingly high. Granted, I do want it to be prelit and flame retardant and safe and beautiful and it’s something that will last for many years. But, I do think you can achieve many of those qualities in a cheaper tree with a little ingenuity.

4 years ago now when I was pregnant with our Son, my husband ran out on Black Friday to pick me up a Christmas tree to decorate. It was $20 or $30 dollars, 6 feet, and frankly just cheap. The tree was pretty bare and transparent.

It needed TLC to look filled it and festive. And I think it looks many, many dollars more expensive than it was in the end so I have to share with you guys.

How To Get The Most Out Of A Cheap Christmas Tree
(and even if you buy real, some of these will work for you, too!)

Tip #1: Fluff, Fluff, Fluff

Fluff the mess out of your tree. Straighten every single branch. Then bend those branches to fill in gaps you’re noticing at this stage. Keep fluffing, straightening, and bending until you cannot fluff any more.

SAMSUNG CAMERA PICTURES

SAMSUNG CAMERA PICTURES

SAMSUNG CAMERA PICTURES

Tip #2: Layer Cheap On Cheap…

Pick up a strand or two of cheap lighted garland. I always use a prelit tree, but these extra strands help to beef up the inner parts of the tree where there are no branches to fluff. Wrap it around the base to thicken it up. Zig Zag it around each of the branches, working your way as far up the tree as your garland will reach.

SAMSUNG CAMERA PICTURES

SAMSUNG CAMERA PICTURES

SAMSUNG CAMERA PICTURES

Tip #3: Bling It Out!

Use your shiniest, most reflective ornaments (or buy some if you’ve got the funds) and hang them at the base of each branch. Hang one on each branch. If you run out, use your cheap glittery ones. Anything that will mirror the branches and bounce around more light.

SAMSUNG CAMERA PICTURES

Tip #4: Let’s Get Real.

If you’re lucky enough to get your hands on real clipping from a pine, stick them around the tree much like you would with decorative picks. If you’re not, pick up garland with realistic features (mine were 60% off at Joann’s and I’ve seen Michaels do the same sale). There were more expensive ones than the ones I picked up that looked much more realistic, but the next step helps disguise the “cheapness” of mine. Lay them on the rows of branches. I picked up 3 rows that were 6 feet. This is obviously not enough to run along every branch. So I spaced them out and used cheap decorative picks that were similar in decorum from the dollar store. I used three of those to stick into the bare rows.

SAMSUNG CAMERA PICTURES

Tip #5: It’s all about the layers.

If you’re using a decorative garland, this is the time to put it on. Lay it on each row of the branches but be sure to leave the branches free to put ornaments on. After the garland is on to your liking, put as many ornaments as you can possibly fit on your tree. I use approximately 300 ornaments on my tree. You can use as many as you own (so long as you like them all and they fit the theme you’re after) or you can pick some up if you’re tree is feeling incomplete. This step is purely about how you want your tree to look, go for what makes you happy!

SAMSUNG CAMERA PICTURES

Tip #6 Plan Ahead

If you plan ahead, you can pick up not only all the pieces to make a dinky tree look majestic, but you can even get a great Christmas tree for incredibly cheap! I always scour Walmart in the days after the Holiday to pick up big containers of ornaments, string lights, gift sets and decor. If you can hang tough through this Christmas and get moving in those days after Christmas, you can have a more magical one next year sometimes at 50% of!

I hope these tips are helpful and interesting and that you’ve found something you can use this year.

(these pictures are actually of my tree from 2013!)

SAMSUNG CAMERA PICTURES

SAMSUNG CAMERA PICTURES

Filed Under: Blog, Holidays

A Beginner’s Photography

November 20, 2015 by CORINNA HENDERSON

I’m not a photographer, even if I try really hard most days, it’s just not my passion. I’ve always dabbled here and there and because of this blog I’ve got a bit of equipment. Recently my son has taken an interest in the equipment laying about and he asked if he could take, “play with mommy’s camera.”

I said sure.

So I popped in my memory card, showed him how to turn live view on and where the “button that takes the picture is.”

The camera is on a tripod with the shutter release timer on. He was quite excited to find he was able to then jump in his photographs.

These are his pictures. I wanted to share them here because it’s his passion. I want to document the happenings in my home and this is what’s happening. Here we go.

I slightly bumped up the highlights, saturation and clarity on these ones.

lower-portion-of-fake-christmas-tree-pink-garland-giraffe-ornament

lower-portion-partially-decorated-christmas-tree

haphazardly-decorated-christmas-tree-bohemian-home

bohemian-home-decorated-christmas-tree

Because he doesn’t have control over any element other than his subject matter, on these ones I’ve adjusted the brightness, contrast and clarity to enhance the subject matter. Some I’ve had to adjust the temperature because the television was casting a blue tint over everything.

a-photo-of-mommy-a-toddlers-exploration-in-photography

mommy-and-puppup-late-evenings

mommy-carson-puppup

my-dog-pup-pup

watching-television-mommy-watches-me-i-love-puppup

attempted-kiss

These were taken the next night with similar edits made to enhance the subject matter.

bluured-carson-november-2015-preparing-for-christmas

my-daddy

the-tabletop

daddy-and-puppup

I think more than just simply showing off my child’s latest infatuation, I hope this gives a little glimpse into what real life is like around here. My husband and I work real jobs during the day so our family time is when we are exhausted at the end of the day. We’ve lost all sunlight, our home is a wreck, but we just want to be together.

I’m behind on vlogs right now, but I do have the footage. The time change has really messed me up and I’m even more tired than usual in the evenings. I’m hoping to get one of those out this weekend as well as work on an update on the bathroom (we’re at a snail’s pace right now). Also, be on the look out for some Christmas related posts *yay*

Filed Under: Blog, Home Files

  • « Go to Previous Page
  • Page 1
  • Interim pages omitted …
  • Page 53
  • Page 54
  • Page 55
  • Page 56
  • Page 57
  • Interim pages omitted …
  • Page 72
  • Go to Next Page »

Primary Sidebar


My name is Corinna and I'm a Gemini. Enamored with the architecture and textiles of South Asia. Lover of incense, the color teal and thrifting. Supporter of small businesses and fair trade. Self proclaimed crazy plant lady. Aiming to live a more natural, vegan life day by day. I read, hike and drink coffee in my spare time. I have 2 cats, a dog and a 4 year old.

Subscribe To My Newsletter

Enter your email to begin receiving a once monthly handwritten email containing updates from the blog as well as tips, freebies and announcements.

Reader Favorites

Designing A Multitasking Bedroom

10 Most Stylish Mirrors

10 of the most stylish mirrors ever

Tips Bohemian Chic Style Textiles

Tips for Bohemian Chic Style Textiles

2018 Blogger Spring Home Tour- Fresh Boho Style

Fresh Boho Spring Home Tour

Boho Botanical Spring Tablescape

Categories

Friends Of A Designer At Home

Thoughts from Alice

Networks


Wayfair Homemakers

More Posts

Autumn Bucket List (Things to do in Fall)

I can feel it coming in the air tonight… Autumn is nearly here! What a joy. I start to feel the excitement when the faint hint of crispness hits the air. Fall is my favorite season. There are so many great things to do in Fall. Somehow I always miss doing activities so this year […]

Starting LDN and everything else I’ve tried for CFS so far…

I’ve been taking low dose naltrexone (ldn) for just over a month at this point and I wanted to share an update on how it’s been going thus far. I started taking ldn because I tried everything else in an attempt to feel better. At my last PCP appointment, I told him I’d be trying […]

Checkerboard: The Latest Insta-Trend

You ever first see a trend and think, “nope, not for me.” That was, and still a little, me with the checkerboard trend. I’ve never liked checkerboard walls or floors. At least not enough to semi-permanently put it somewhere in my home. But I am still in pursuit of an interior design certificate and job […]

My best Amazon Prime Purchases Ever

I’m sure you don’t need me to tell you that it’s time for Amazon’s annual Prime day. And you likely don’t need me to tell you about my best Amazon Prime purchases ever. But I’m telling you, these are such good products and I got them for a steal too!

Celebrating Pride Month With LGBT Businesses

Part of mindful consumerism, for me at least, is intentionally seeking out companies founded and owned by marginalized communities. Heritage and pride months are the perfect reminder to seek out alternative sources for goods and services. Join me in celebrating pride month with LGBT businesses below.

AAPI Skincare & Beauty Haul & Demo (dry skin, fragrance sensitive)

As my mental health has improved, I’ve enjoyed getting back into my mindfulness consumerism series. With AAPI month upon us, and quickly coming to an end, I took stock of what I needed to purchase and set out to buy replacements from AAPI skincare and beauty brands. I needed face wash, serum, and oil. For […]

Simple Minty Eye Makeup Look (Indigenous Beauty Brands)

As much as I loathe dealing with fallout atop base makeup, I still always start with base makeup. But lucky for me, there’s no powder products going on my eyes today. Despite being a simpler makeup look, there’s still a lot of drama going on. A sharp cat eye winged liner elevates the eyes. And […]

Indigenous Owned Shopping Faves

You’re shopping. Here’s everything you need to be shopping for from indigenous owned brands. From beauty to fashion to accessories and body care, these products are top tier. These may be my indigenous owned shopping faves, but they’re quality from design to ingredients to workmanship.

Full Face Latinx Brands

From September 15 – October 15 is Hispanic Heritage Month. During this time I wanted to put together a full face of Hispanic owned beauty brands. Some of these brands are well known and others are smaller brands. I tried to find a balance of big name beauty brands and up and coming. After testing […]

Here’s My Faves for Hispanic Heritage Month

Hispanic Heritage Month is upon us! It’s always my goal to be mindful of where I’m spending my money. During Heritage and Pride months, I try to make an effort to seek out brands that I may not otherwise be aware of. It’s no surprise, what’s out there is truly amazing. And I want to […]

  • Home
  • Design Advice
  • DIY Projects
  • Room Inspiration
  • About
    • Contact
    • Sponsorship
    • Policies
  • Shop

Recently

downloadable chinese free art prints

Chinese free art prints

One of the fastest and easiest ways to decorate a wall is with free art prints. There are literally endless themes and colors. The free art prints I’m sharing today are all Chinese themed. Incorporate Chinese free art prints for the lunar new year. Or create a long term decorative destination. Wherever and whenever these […]

The Year of 25 Projects

The Year of 25 Projects

For the past few years, I’ve wanted to start the year with a list of home projects. These are projects I want to accomplish in the upcoming year. However, something always distracts me, and I end up not following through. Things have been going smoothly for the past six months, and I believe I’m finally […]

DIY Lunar New Year Decorations

Make It DIY Lunar New Year Decorations

Lunar New Year, aka Chinese New Year, is a celebration of the beginning of the lunisolar Chinese calendar. If you didn’t know, there are many calendars throughout the world. This is my first year celebrating Chinese New Year. I felt inspired and creative so I made DIY Lunar New Year Decorations. I just had to […]

The Useful List Of Practical Gifts

Sure, Valentine’s day is on the horizon but there’s seemingly always some reason to need a gift. Therefore I bring you a timeless, useful list of practical gifts. Some, if not all, of these gifts can be used and appreciated all year long. Even better, they’re all around $35. It’s a gifting win-win-win. You win, […]

Honoring Indigenous People for Heritage Month

I am sitting here, stuck, trying to come up with the best way to honor Indigenous People for this year’s Native American Heritage Month. While not indigenous myself, I do live on their land and benefit from work they’ve done. I want to give back communities that I admire and respect. Therefore, I want to […]

Dark Halloween Art Print Collection

If you’ve seen some of my recent blog posts, you know I love temporary seasonal art. This time I wanted to share a dark Halloween art print collection. It is spooky season after all! I believe this collection is the one I’ve spent the most time on. Halloween is my favorite and that’s made it […]

Instant Autumn Art Print Collection

Recently, I shared a collection of free dark autumn art prints. For those into a brighter aesthetic, I wanted to also share an instant autumn art print collection with brighter colors and themes. This collection features scenery, colors, flora and fauna analogous with Fall. If you appreciate easy and free decorating, you’re in the right […]

Is it safe to buy makeup on Poshmark? Testing makeup.

Is it safe to buy makeup on Poshmark?

You probably know that you can buy clothing and accessories on Poshmark, but did you know you could buy makeup, too? I was skeptical when I first came across this. Is it safe to buy makeup on Poshmark? I had to know. So, I placed several orders, with several different sellers, and I’ve had a […]

Dark Autumn Art Print Collection

Autumn decorating season is upon us. Have you started? I don’t have much up yet but I have been collecting things to put up. Usually for seasonal decorating, I go for creating a vibe. I feel like Fall can go two different ways. The first, warm and vibrant. The second, moody and dark. Today I’m […]

Autumn Bucket List (Things to do in Fall)

I can feel it coming in the air tonight… Autumn is nearly here! What a joy. I start to feel the excitement when the faint hint of crispness hits the air. Fall is my favorite season. There are so many great things to do in Fall. Somehow I always miss doing activities so this year […]

Keep Reading...

@Instagram

Subscribe