Hey Guys!
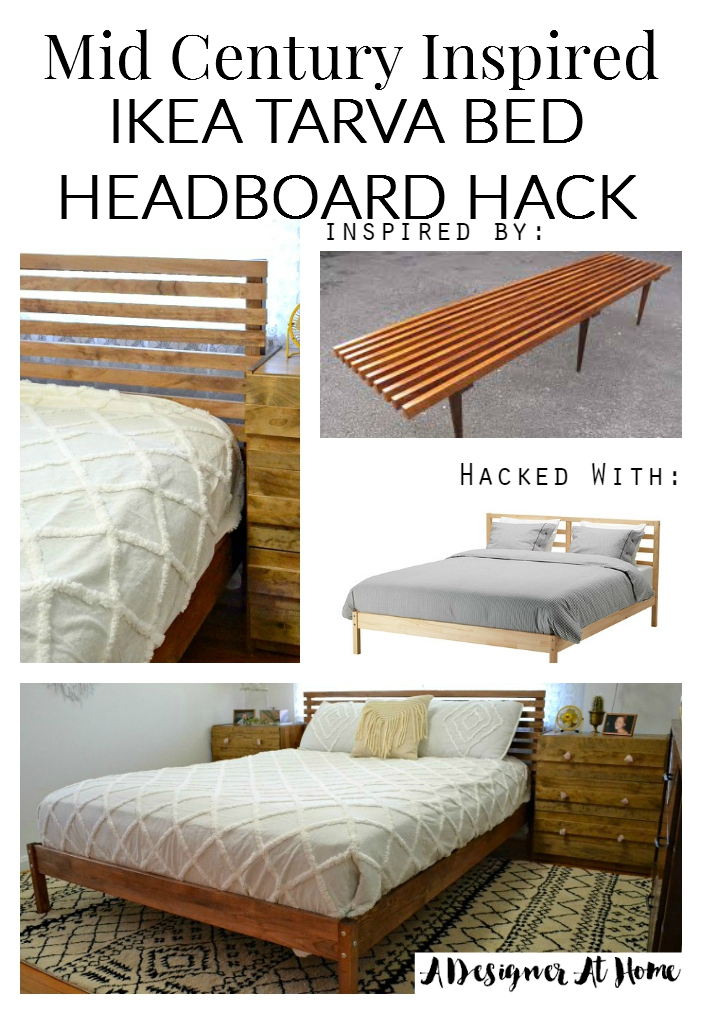
Today I’m here with the Ikea Tarva Bed headboard hack from my boho bedroom. A solid wood bed frame gets expensive. Luckily, IKEA has the solid pine Tarva bed. I find the design a little blah, though. I wanted something reminiscent of mid century design (and unfortunately those never turn up in the right size on Craigslist for me).
If you’re a fan of midcentury furniture, you’ll probably have come across many slatted benches and coffee tables. I like the airiness of them. And better yet, the slatted design allows for air flow. Super important to factor in when your bed is situated over the only vent in the room. Several things to consider later and I came to the conclusion that an IKEA Tarva Bed Hack was a must.
If you like this bed I created and don’t like complicated DIYs, this is a match made in heaven!
Here’s What I Used:
IKEA Tarva Bed in the Queen size
Minwax stain in special walnut
2 Paint Brushes
A power drill with phillips head bit and screws
1 x 2 Pine lumber (choose a quality you’re comfortable with, but note that the frame is pine. so if you want it to match, you should go with pine in a 1 x 2 size)
How I Made It: Mid Century Inspired IKEA Tarva Bed Hack
Follow the assembly directions for just the headboard, omitting this part:

Cut the 1 x 2s down to 64 inches. This will leave a bit of overhang on either side of the headboard frame.
Stain and Seal all of the included parts minus the slats in the headboard and the 1 x 2’s. We won’t be using those slats and will be using our own for a more mid century look.

Lie the headboard face up on a flat surface and wood glue the 1 x 2s onto the face of the headboard. Start from the top, and use the excess pieces of 1×2 as markers between the slats.
My lumber got rained on in transit so it warped a bit. I find it okay, not really noticeable, and adds that “real life” touch to a true DIY. So be easy on yourself if things don’t turn out perfect.

Once the glue dries, flip the headboard over and drill into the back of each slat through the frame of the headboard to ensure they stay in place. 
Then finish assembling the bed according to the directions.
It’s super easy, but still custom enough not to scream, “Hey! Look at me! I’m an IKEA bed!” Not that there’s anything wrong with IKEA beds, they just don’t always fit into a vintage-y/boho-ey space.
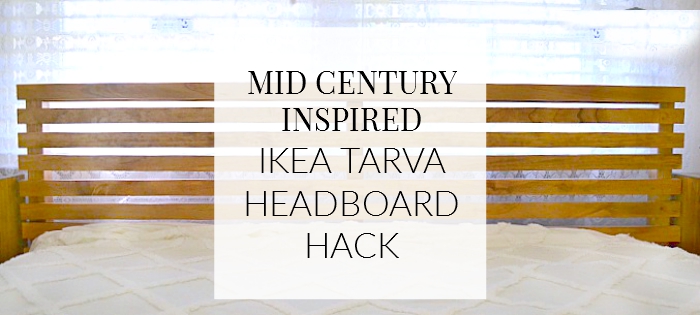
And here’s how the bed turned out:


PS, I’m certain this could be done with the FJELLSE, just note it only comes in a Full/Double, and that’s just a tad tight for my hubby and I (hence the “wrong size” authentic mid century beds I find on Craigslist).
PSS, give this post a share for me, please? I love to share my creations with friends of those who come here!
I really appreciate you being here. <3